Step 5
Hardware Configuration#
In this section you can create different profiles with specific values. If no profile is created, the virtual machine settings will not change and its values will be equal to the template. Add at least one profile if you want to make a change.
You can also select the ISO files that you want to make available to your customers in the last section. To add ISO files, go to the ISO Files submenu in the Plans menu.

VM Options#
This section consists of two sections
VM Naming Policy#
You can define how to name a virtual machine by dragging items. Note that a unique parameter must be used in naming. The IP address and virtual machine ID are two unique parameters that can be used. The ID is always unique and we recommend that you put this parameter at the end of the name so that no duplicate name is created under any circumstances. The rest of the parameters are unnecessary and you can use any of them in naming the service.
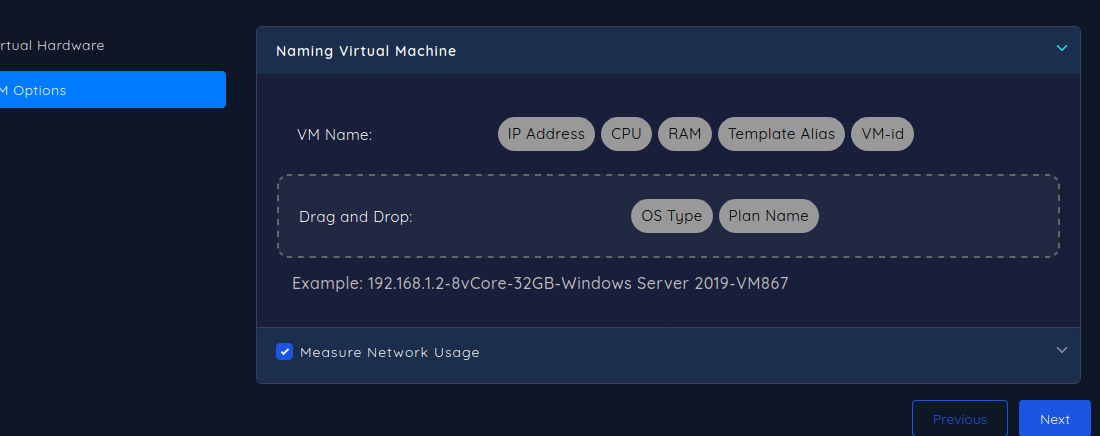
Measure Network Usage#
caution
This section is not yet complete so it is not recommended to use it, but if you want to test it, contact the technical unit.
This option can be used to prevent virtual machines from consuming too much of the network. After activating this option, various restrictions can be set on the servers. As soon as a service is restricted, its network will be disconnected and reconnected after the restriction is lifted. These limitations and options include:
- Limit Transmiting Data is to limit the volume of data sent by the virtual machine. The volume that is uploaded to the Internet from a virtual machine.
- Limit Recieving Data is for limiting the amount of data received in the virtual machine. The volume that a virtual machine downloads from the Internet.
- Limit Both Recieving and Transmiting Data is used to limit the volume consumed. both server upload and download.
- Reset Quota after is used to reset the quota. For example, you can set a traffic limit of 10 GB per week. Any service that consumes more than this amount will remain disconnected until the end of the week.
- The last part is intended to apply a relative consumption limit. For example, if you want the download volume to the server to be less than one tenth of the upload from the server, select the download to upload ratio type and set the maximum allowed ratio to 0.1. These restrictions must be applied after a certain period of time. For example, 24 hours after the start of service. Because if the restrictions are applied from the beginning, this ratio may be exceeded before the optimal use of the server and the user may lose access. You can set this period according to the volume consumed or the duration.
After making the settings, click Next.